>>
30-MINUTE MEALS! Get the email series now →


A delicate, bakery-style chocolate sponge layered with homemade raspberry jam and chocolate whipped cream — light, airy, and irresistibly delicious.
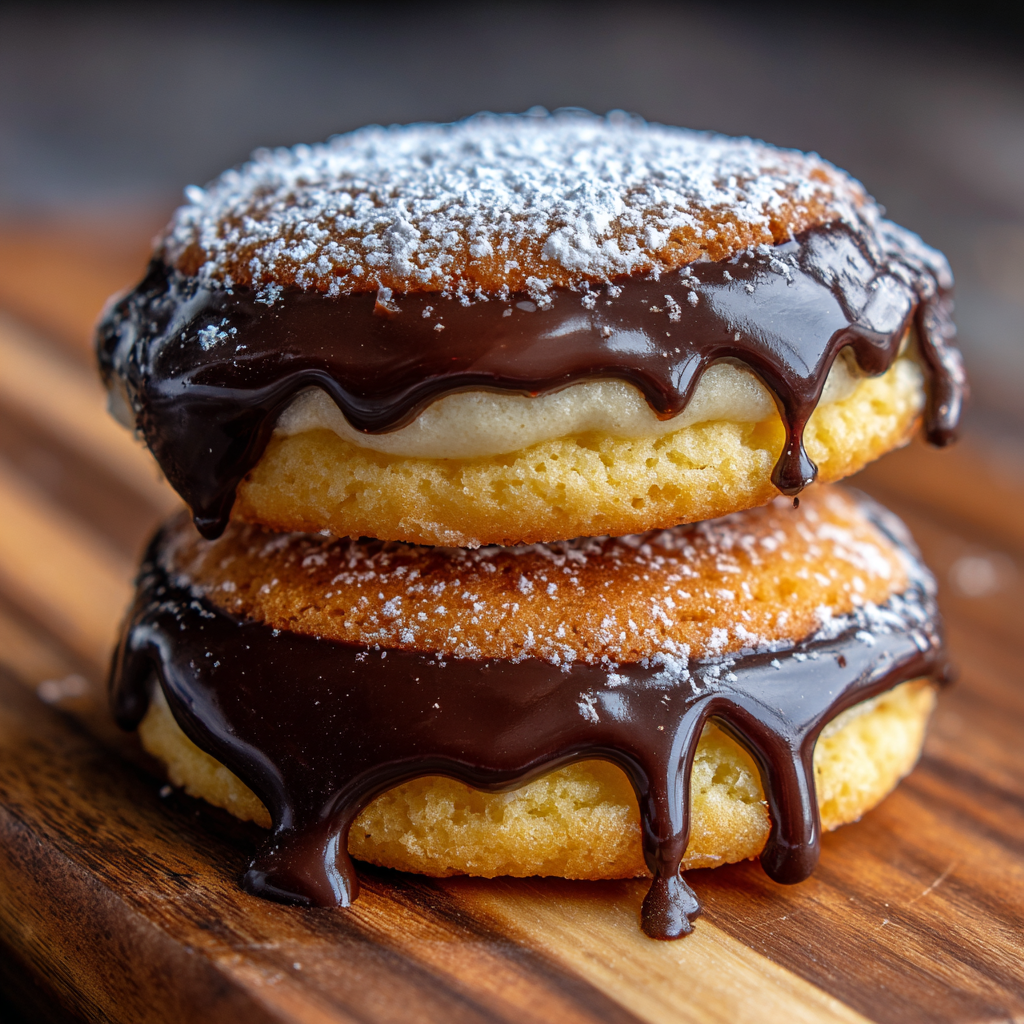
This chocolate sponge cake has been my go-to when I want something that tastes like a bakery treat but is actually light enough for a weeknight celebration. I first discovered this method while experimenting with separating eggs and treating the whites and yolks differently to coax out maximum volume. The result is a cake that feels weightless on the fork, with a tender crumb that soaks up simple syrup without becoming heavy. I paired it with a bright homemade raspberry jam and a cocoa-sweetened whipped cream, which balances the cake’s gentle chocolate notes and makes each bite sing.
I remember baking this for a small anniversary dinner; the kitchen smelled faintly of cocoa and warm vanilla, and our guests kept saying it was the best chocolate sponge they'd ever had — moist but not dense, delicate yet perfectly stable for stacking and decorating. What makes this version special is the two-stage egg whipping: whites beaten to stiff peaks and yolks whipped with sugar and water to create a ribbon-like, voluminous base. Those small technique details turn an ordinary sponge into something memorable.
When I tested this several times, I found that small changes — like using room temperature eggs and brushing each layer with simple syrup — made the biggest difference. Family and friends always ask how it stays so light yet moist; the secret is gentle folding and a quick syrup brush. This cake performs beautifully for birthdays, tea parties, or anytime you want a dessert that looks and tastes like you spent hours on it without the fuss.
My absolute favorite part is brushing the warm sponge with syrup — it transforms the crumb from nice to sublime. I also love how the chocolate whipped cream mirrors the cake’s lightness while adding a creamy, chocolatey counterpoint. Every time I serve this, someone asks for the recipe and I always tell them the two small tricks: beaten yolks to ribbons and a generous brush of simple syrup. It really does make all the difference.
Store the finished cake covered in the refrigerator for up to 3 days. For longer keeping, freeze unfrosted layers wrapped tightly in plastic and foil for up to 3 months — thaw in the refrigerator overnight. If assembled, keep the cake in an airtight cake carrier to prevent the whipped cream from absorbing fridge odors. To re-fluff the whipped cream slightly after refrigeration, whisk gently by hand for a few seconds or pipe fresh rosettes on top. Always bring slices to room temperature for 20–30 minutes before serving for best flavor.
If you cannot source cornstarch, use 4 tablespoons of cake flour in place of the cornstarch + the 2 tbsp all-purpose flour, though results will vary slightly. For a dairy-free version, swap the whipped cream for stabilized coconut cream — chill a can of full-fat coconut milk and whip the solidified cream with powdered sugar; note the flavor will be coconut-forward. To make this gluten-free, use a 1-to-1 gluten-free flour blend designed for cakes and keep the cornstarch component; expect a slightly different crumb structure but similar lightness if folded carefully.
Serve slices with a drizzle of warmed raspberry coulis and extra fresh berries for contrast. For an afternoon tea, pair with Earl Grey or a single-origin coffee to highlight the cocoa notes. This sponge also makes an elegant tiered celebration cake when doubled in scale — stack with parchment separators and chill between layers to make decorating easier. Garnish with chocolate shavings, toasted almond slices, or edible flowers for a refined look.
The light sponge concept has roots in British baking — the Victoria sponge is a classic that celebrates airy cake filled with jam and cream. Chocolate versions are a modern evolution that combine the delicate technique of sponge-making with richer cocoa flavors. Historically, sponge cakes relied on beaten eggs for lift rather than chemical leaveners; this tradition carries forward here with the focus on technique rather than heavy butter or creaming methods.
In summer, swap raspberries for fresh peaches or a summer berry compote; in cooler months use a tart cherry filling or spiced orange curd to complement cocoa. For winter gatherings, fold a pinch of warm spices into the whipped cream — cinnamon and ground ginger add cozy depth. You can also fold a tablespoon of espresso into the simple syrup for a coffee-kissed layer that enhances chocolate intensity.
Make the sponges a day ahead and refrigerate well-wrapped; prepare the simple syrup and jam two days ahead to let flavors meld. Whip the cream shortly before assembly for best stability, or stabilize it with a tablespoon of mascarpone if you need a firmer hold for longer display. When prepping multiple cakes, label each wrapped layer with date and content to avoid mix-ups and ensure you use older layers first.
Every time I bake this chocolate sponge, it reminds me that technique triumphs over complexity: a few well-executed steps deliver a dessert everyone loves. Give these steps a try and make it your own — swap fillings, add texture, and enjoy sharing it with the people you care about.
Always use room-temperature eggs for maximum volume when whipping whites and yolks.
Do not grease the sides of the pans; the batter needs to cling to rise evenly.
Brush sponges generously with simple syrup to keep layers moist and extend freshness.
Fold gently: overmixing removes air and leads to denser texture.
For clean slices, chill the cake briefly and use a hot, dry knife wiped between cuts.
This nourishing light & airy chocolate sponge cake recipe is sure to be a staple in your kitchen. Enjoy every moist, high protein slice — it is perfect for breakfast or as a wholesome snack any time.
If you don't have a fan oven, increase the temperature to 347°F (175°C) and watch closely; baking time should be similar but the cake may brown slightly faster.
Yes — brush each layer with simple syrup and refrigerate in an airtight container for up to 3 days. For longer storage freeze unfrosted layers up to 3 months.
This Light & Airy Chocolate Sponge Cake recipe makes perfectly juicy, tender, and flavorful steak every time! Serve with potatoes and a side salad for an unforgettable dinner in under 30 minutes.
Preheat the oven to 320°F (160°C) fan. Line the bottoms of two 8 x 3 inch pans with parchment and leave the sides ungreased.
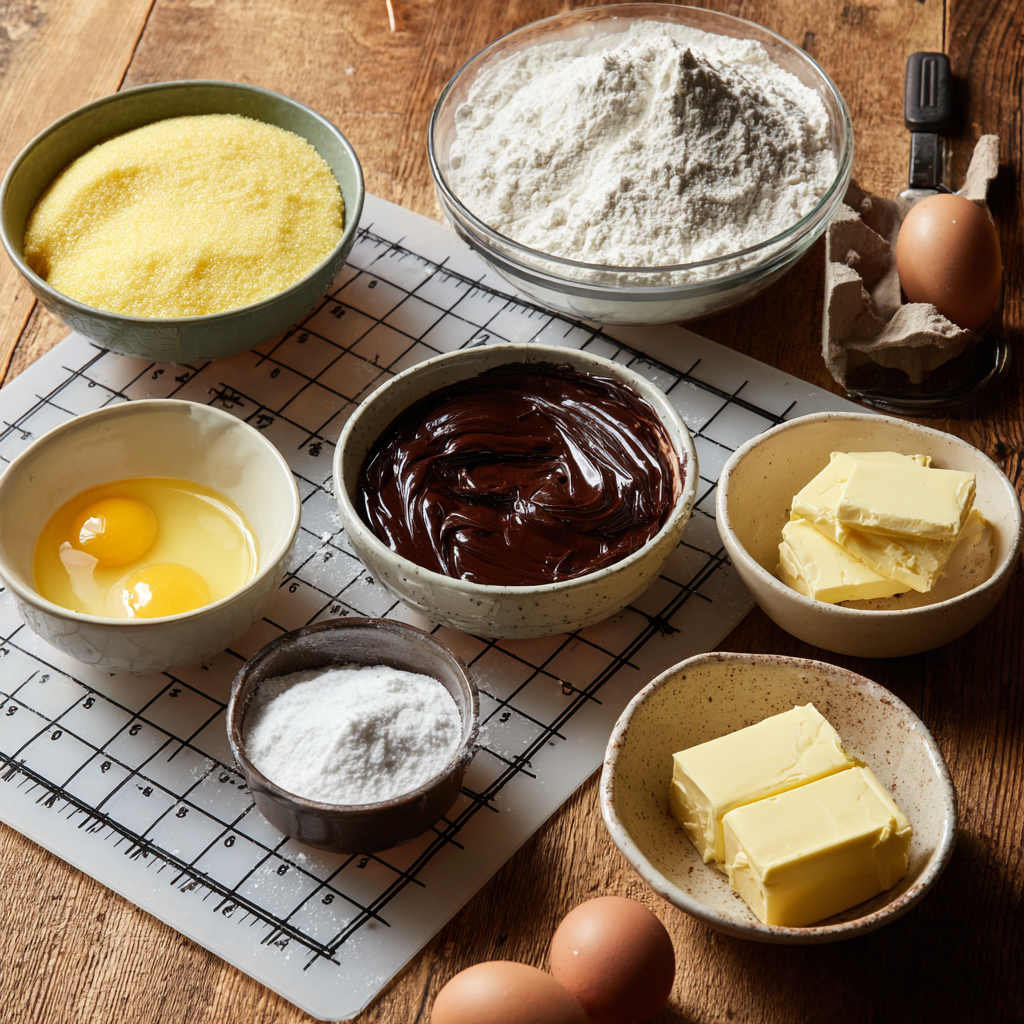
Combine flour, cornstarch, baking powder, cocoa, instant coffee and salt in a bowl and whisk until even.
Beat egg whites with vinegar until foamy; gradually add 1/3 cup sugar and whip to stiff, glossy peaks (about 4 minutes).
Beat remaining 1/3 cup sugar with warm water, add yolks and vanilla, whip on medium-high for 4 minutes then 1 minute low until ribbon stage; stream in oil.
Fold half the whites into the yolk mixture, sift in half the dry mix, fold, then add remaining whites and dry mix gently until just combined.
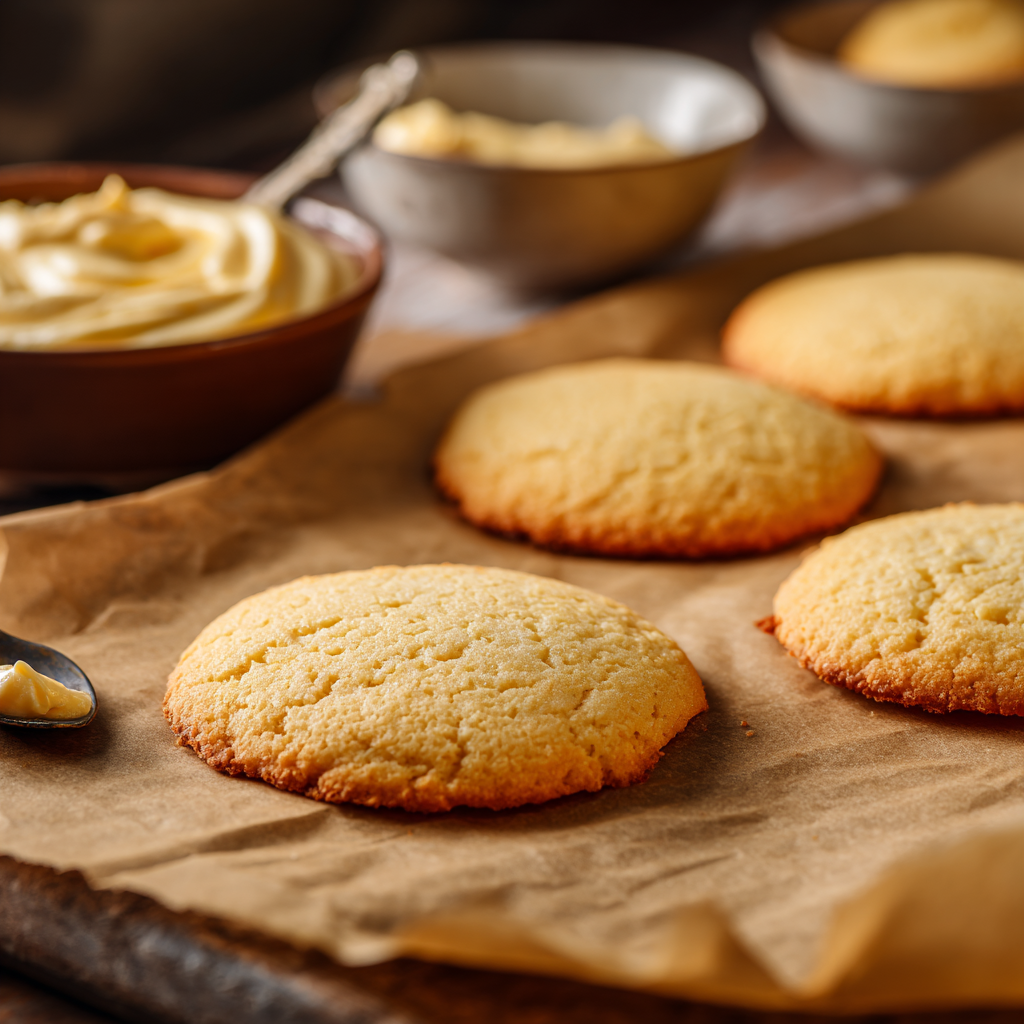
Divide batter into pans, tap to release bubbles, bake 20 minutes until springy. Tap pans immediately on counter and invert to cool in tins for about 1 hour.
Brush cooled layers with simple syrup, whip chocolate cream to stiff peaks, layer cake with jam, strawberries and cream, finish with decoration.
Last Step: Please leave a rating and comment letting us know how you liked this recipe! This helps our business to thrive and continue providing free, high-quality recipes for you.
Leave a comment & rating below or tag
@kitchenfunwithmy3sons on social media!

Buttery pastry envelopes a sweet, creamy cinnamon filling for an irresistible warm dessert or snack—ready in just 30 minutes.

A bright, one-skillet meal that pairs sweet pineapple with savory chicken and fluffy jasmine rice for an easy, dairy-free weeknight dinner.

Warm tortilla filled with creamy sweetened cream cheese, fresh blueberries and a drizzle of honey—an easy, satisfying morning treat ready in minutes.
Leave a comment & rating below or tag @kitchenfunwithmysons on social media!
Enjoyed this recipe? Share it with friends and family, and don't forget to leave a review!
This recipe looks amazing! Can't wait to try it.
Comments are stored locally in your browser. Server comments are displayed alongside your local comments.
Quick and easy dinner ideas delivered to your inbox.