
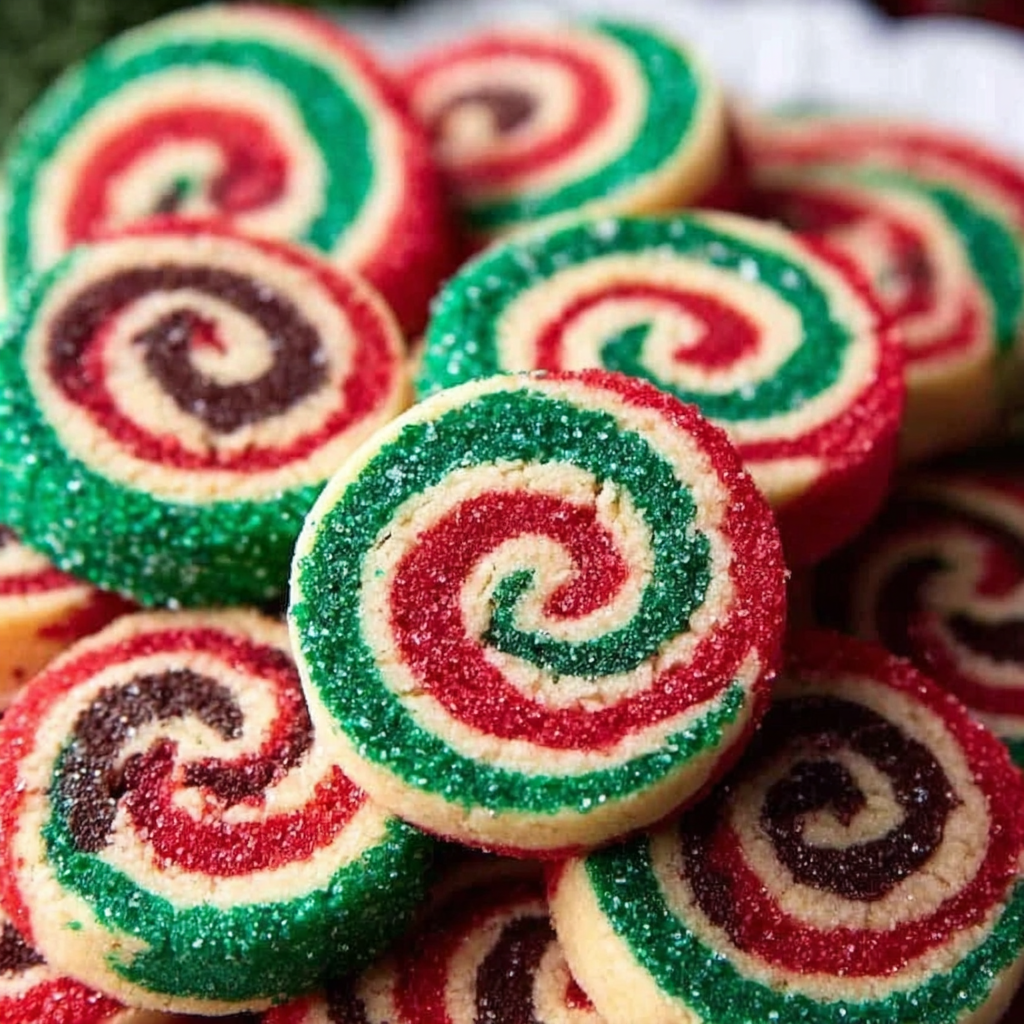
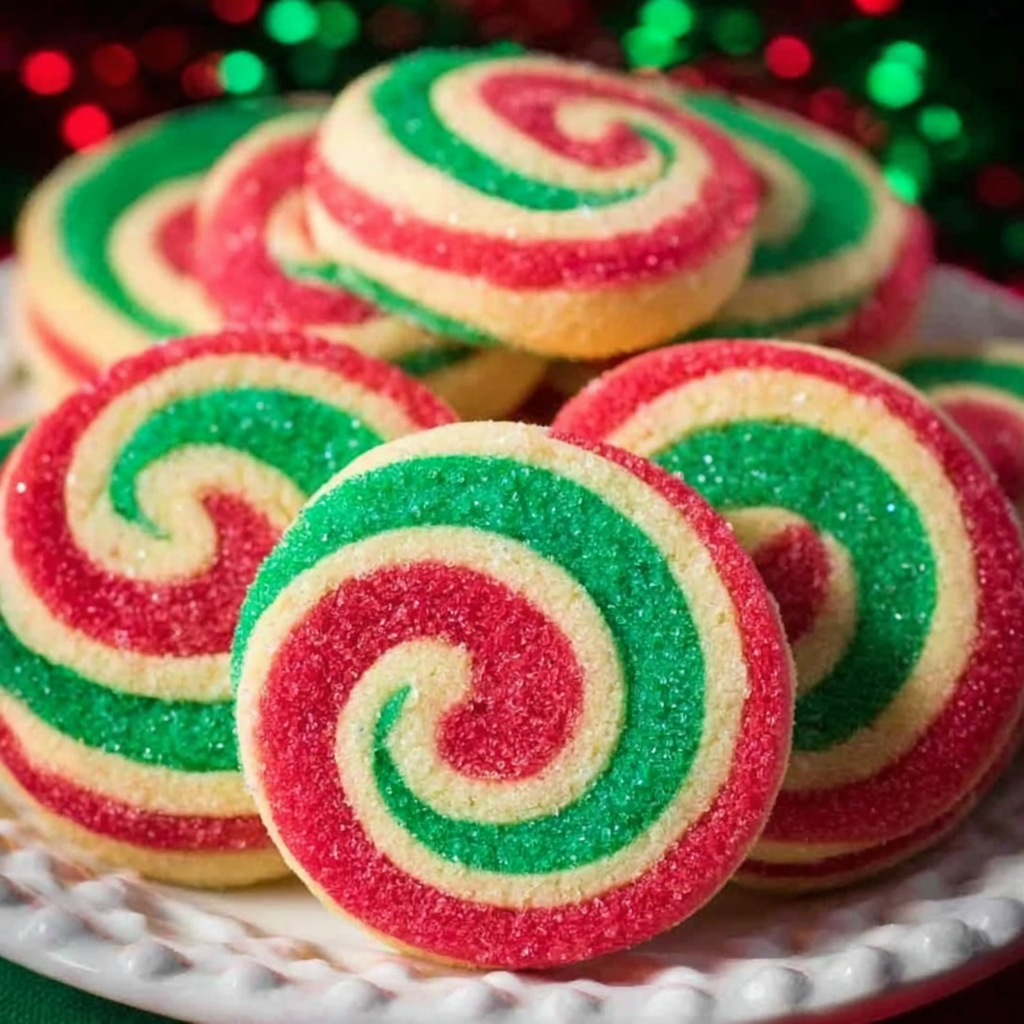
Christmas Pinwheel Cookies

These festive Pinwheel Sugar Cookies might be the best Christmas cookie recipe ever — simple sugar cookie dough shaped into a red, white, and green spiral that’s as fun to make as it is to eat.
Why You'll Love This Recipe
- Visual impact with minimal effort: the spiral design looks intricate but is produced from one straightforward dough and a few rolling steps.
- Make-ahead friendly: dough discs and rolled logs refrigerate or freeze well, making it easy to spread the work over several days.
- Family-friendly technique: kids can help color, roll, and press sprinkles onto the finished log for a festive activity.
- Accessible ingredients: uses pantry staples like flour, butter, sugar, and an egg — no special equipment beyond a rolling pin and baking sheets.
- Customizable: switch colorways, add extracts, or roll edges in nuts, toasted coconut, or sprinkles for different occasions.
- Reliable texture: crisp edges with a soft, tender middle when sliced to about 1/2-inch thick and baked 13–15 minutes.
I love how this recipe became my signature holiday cookie. Neighbors ask for a dozen every year, and my niece insists on helping pick the sprinkles. The method rewards patience and neat rolling; once you practice it builds confidence quickly and becomes a ritual I look forward to each December.
Ingredients
- All-purpose flour: 3 cups (12.75 ounces). Use a reliable brand like King Arthur or Gold Medal, spooning into the cup and leveling rather than scooping to avoid over-measuring. Flour gives structure — too much will make the cookies tough.
- Baking powder: 1 teaspoon. Ensures a gentle lift so the cookies puff slightly without spreading too thin.
- Salt: 1/2 teaspoon. Balances sweetness and enhances the butter flavor.
- Unsalted butter: 1 cup (8 ounces), room temperature. Use a high-quality butter (e.g., Plugrá or Kerrygold) for richer flavor; let it soften but not melt.
- Granulated sugar: 1 1/4 cups (8.75 ounces). Provides sweetness and helps create tender crumb and lightly crisp edges.
- Large egg: 1, room temperature. Adds richness and binds the dough; warm eggs incorporate more evenly.
- Vanilla extract: 2 teaspoons. Use pure vanilla extract for best flavor; substitute part almond extract for a hint of marzipan if desired.
- Gel food coloring: red and green. Americolor gel works well because it produces vivid colors without thinning the dough like liquid coloring.
- Sprinkles (optional): 1 cup (6.75 ounces). Small nonpareils or jimmies adhere best when rolled on the dough log’s edge.
Instructions
Mix dry ingredients: Whisk 3 cups flour, 1 teaspoon baking powder, and 1/2 teaspoon salt in a medium bowl until evenly distributed. This prevents pockets of leavening and ensures consistent texture. Cream butter and sugar: In the bowl of a stand mixer fitted with the paddle, beat 1 cup room-temperature unsalted butter and 1 1/4 cups granulated sugar on medium speed for 2–3 minutes until light and fluffy. Scrape down the bowl once to keep the mixture even; this aeration helps the cookies rise modestly and become tender. Add egg and vanilla: On low speed, add 1 large room-temperature egg and 2 teaspoons vanilla extract, mixing until fully incorporated. The mixture should be smooth and glossy before adding flour. Combine with flour: With the mixer on low, gradually add the flour mixture until just a few streaks remain. Stop and finish folding by hand with a spatula to avoid overmixing. The dough should be soft, supple, and not sticky; if it’s tacky, chill briefly until manageable. Divide and color the dough: Divide dough into three equal portions (about 10 ounces each if using a kitchen scale). Leave one portion uncolored. Color the other two portions red and green using gel coloring, kneading lightly by hand or pulsing briefly in the mixer — avoid overworking to keep the texture tender. Chill the dough discs: Form each color into a flat disc, wrap tightly, and chill at least 45 minutes until firm. Cold dough is far easier to roll thin and helps maintain clean spiral lines. Roll into rectangles: Roll each chilled disc between two sheets of parchment into a long rectangle about 6 x 13 inches. Aim for even thickness; don’t add extra flour if possible, as flour will dry the dough and toughen cookies. Stack and roll: Stack rectangles in this order: green on the bottom, plain white in the middle, red on top. Use the parchment to help lift and align the layers, then roll the stacked dough tightly into a log to form the spiral. The tighter the roll, the clearer the pinwheel pattern when sliced. Optional sprinkle edge: Brush the log lightly with a thin layer of corn syrup diluted with a drop of water, then roll the exterior on a sheet of sprinkles so the edges are coated. Wrap the log tightly and chill at least 45 minutes until firm. Slice and bake: Preheat the oven to 350°F (175°C). Using a large, sharp chef’s knife, slice the chilled log into rounds just under 1/2" thick (about 30 cookies). Place on parchment-lined baking sheets with a few inches between. Bake 13–15 minutes until cookies are puffed and the center loses its raw shine. Edges should be lightly golden while centers remain tender. Cool and store: Let the cookies cool on the baking sheet for a few minutes, then transfer to a cooling rack. Store cooled cookies in an airtight container at room temperature for 4–5 days, or freeze unbaked logs up to 3 months.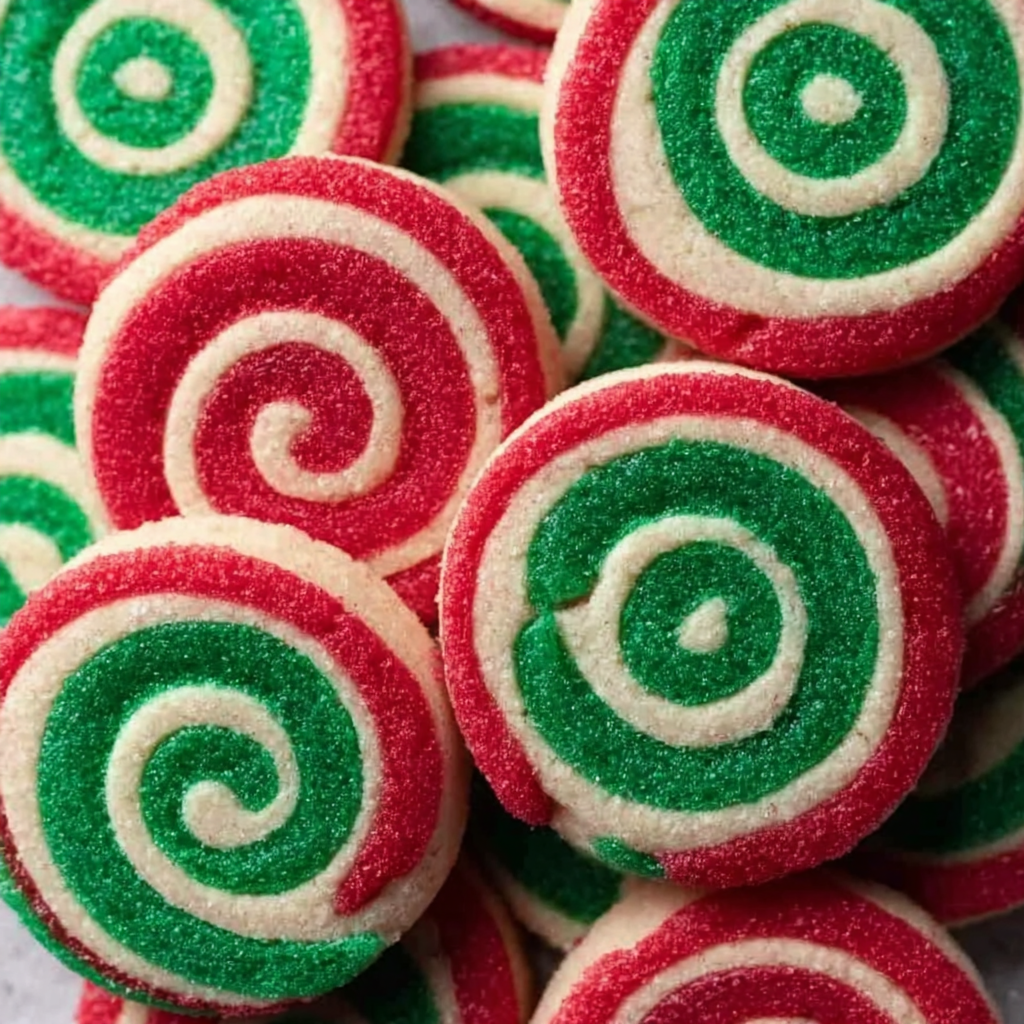
You Must Know
- These cookies freeze well: wrapped logs freeze for up to 3 months; slice from frozen and add a minute or two to baking time.
- Texture note: target a slightly crisp edge with a soft interior — avoid baking until fully firm in the center or the cookies will be dry.
- Allergens: contains wheat, dairy, and egg.
- Yield and timing: the recipe makes approximately 30 cookies when sliced just under 1/2" thick; total active time is about 1 hour with resting and chilling adding another 1.5 hours.
My favorite thing about these cookies is the ritual of rolling and stacking. The first time I made a dozen, I wrapped each log in festive plastic wrap and gifted one to my neighbors; they returned the favor by bringing over a steaming mug of cocoa, and that’s how this recipe became a holiday staple. Little hands love watching the swirl reveal as you slice the log — it’s a small, satisfying magic moment every time.
Storage Tips
Store fully cooled cookies in an airtight container at room temperature for up to 5 days. For longer storage, freeze baked cookies in a single layer on a sheet until firm, then transfer to a freezer-safe container for up to 2 months. To freeze unbaked logs, wrap tightly in plastic wrap and then foil; thaw in the refrigerator before slicing. To reheat, warm cookies 10–15 seconds in the microwave or 3–4 minutes at 300°F in a preheated oven to refresh crispness.
Ingredient Substitutions
If you need to adapt the recipe, you can swap up to half the all-purpose flour with a 1:1 gluten-free baking flour blend, but results will vary — texture may be more crumbly. For dairy-free versions, use a plant-based stick butter replacement and ensure your milk-free substitute is at a similar firmness; flavor will be slightly different. Replace vanilla with 1/2 teaspoon almond extract for a nutty note, or add 1 teaspoon citrus zest for brightness. If you prefer a chocolate swirl, replace one color portion with a cocoa-flavored dough made by reducing flour slightly and adding 2 tablespoons cocoa powder.
Serving Suggestions
Arrange cookies on a festive platter with greenery and ribbon for a holiday party, or package in small boxes for gifts. Pair with hot chocolate, mulled cider, or a simple cup of black tea. For a dessert board, offer a trio of cookies with peppermint bark and spiced nuts for contrast in texture and flavor.
Cultural Background
Pinwheel-style rolled cookies have been enjoyed in home baking for generations as a playful take on layered, shaped cookies. The spiral concept translates across cultures — from European rolled cakes to layered Scandinavian cookies — but the red-white-green motif is especially tied to modern Christmas color traditions in the United States.
Seasonal Adaptations
Change the color palette for other holidays: black and orange for Halloween, pastel ombré for Easter, or rainbow stripes for celebrations. Swap sprinkles for finely chopped toasted almonds or coconut to create themed textures. Add warm spices like cinnamon or cardamom for winter variations, or citrus zest for bright spring versions.
Meal Prep Tips
Make dough discs ahead and keep them chilled for up to 48 hours — this is great for spreading the work across two days. Assemble and roll logs the night before you plan to bake; firm logs are much easier to slice cleanly. For cookie exchanges, bake and cool the cookies fully, then layer sheets of parchment between cookies in sturdy bakery boxes to prevent sticking and breakage.
These pinwheel cookies are equal parts craft and comfort: they look impressive but are completely achievable with a little patience. I hope you enjoy making them with family as much as I do — and that they become a bright little tradition on your holiday table.
Pro Tips
Use gel food coloring to avoid thinning the dough; add color sparingly and knead until evenly distributed.
Chill the dough well between steps; cold dough slices cleaner and produces sharper swirls.
Slice the log with a large, sharp knife and a gentle sawing motion to keep edges neat.
If dough becomes sticky while rolling, return to the refrigerator for 10–15 minutes rather than adding flour.
For even baking, rotate pans halfway through the bake time if your oven has hot spots.
This nourishing christmas pinwheel cookies recipe is sure to be a staple in your kitchen. Enjoy every moist, high protein slice — it is perfect for breakfast or as a wholesome snack any time.
Tags
Christmas Pinwheel Cookies
This Christmas Pinwheel Cookies recipe makes perfectly juicy, tender, and flavorful steak every time! Serve with potatoes and a side salad for an unforgettable dinner in under 30 minutes.
Instructions
Mix dry ingredients
Whisk together 3 cups all-purpose flour, 1 teaspoon baking powder, and 1/2 teaspoon salt in a medium bowl until evenly combined.
Cream butter and sugar
In a stand mixer fitted with the paddle, beat 1 cup softened unsalted butter and 1 1/4 cups granulated sugar on medium speed for 2–3 minutes until light and fluffy.
Add egg and vanilla
With mixer on low, add 1 large room-temperature egg and 2 teaspoons vanilla extract and mix until fully incorporated and smooth.
Combine with flour
Slowly add the dry ingredients on low speed until just a few streaks remain, then finish folding by hand to avoid overmixing; dough should be soft and not sticky.
Divide and color dough
Divide the dough into three equal portions (about 10 ounces each). Leave one plain and color the other two with gel food coloring — red and green — kneading gently until uniform.
Chill the discs
Form each portion into a flat disc, wrap tightly in plastic, and refrigerate for at least 45 minutes until firm.
Roll thin rectangles
Roll each chilled disc between parchment into a rectangle about 6 x 13 inches, aiming for even thickness without adding extra flour.
Stack and roll into a log
Stack the rectangles (green bottom, white middle, red top) and roll tightly into a long spiral log using the parchment to help lift and guide.
Optional sprinkle coating
Brush the outside of the log lightly with diluted corn syrup and roll in sprinkles to coat the edges; wrap and chill at least 45 minutes until firm.
Slice and bake
Preheat oven to 350°F. Slice the chilled log into rounds just under 1/2" thick and place on parchment-lined baking sheets. Bake 13–15 minutes until centers lose their raw shine and edges are lightly golden.
Cool and store
Cool on the baking sheet for a few minutes, transfer to a rack to cool completely, then store in an airtight container for up to 5 days or freeze for longer storage.
Last Step: Please leave a rating and comment letting us know how you liked this recipe! This helps our business to thrive and continue providing free, high-quality recipes for you.
Nutrition
Did You Make This?
Leave a comment & rating below or tag
@kitchenfunwithmy3sons on social media!
Categories:
You might also like...
Cinnamon Sugar Cream Cheese Rolls
Buttery pastry envelopes a sweet, creamy cinnamon filling for an irresistible warm dessert or snack—ready in just 30 minutes.
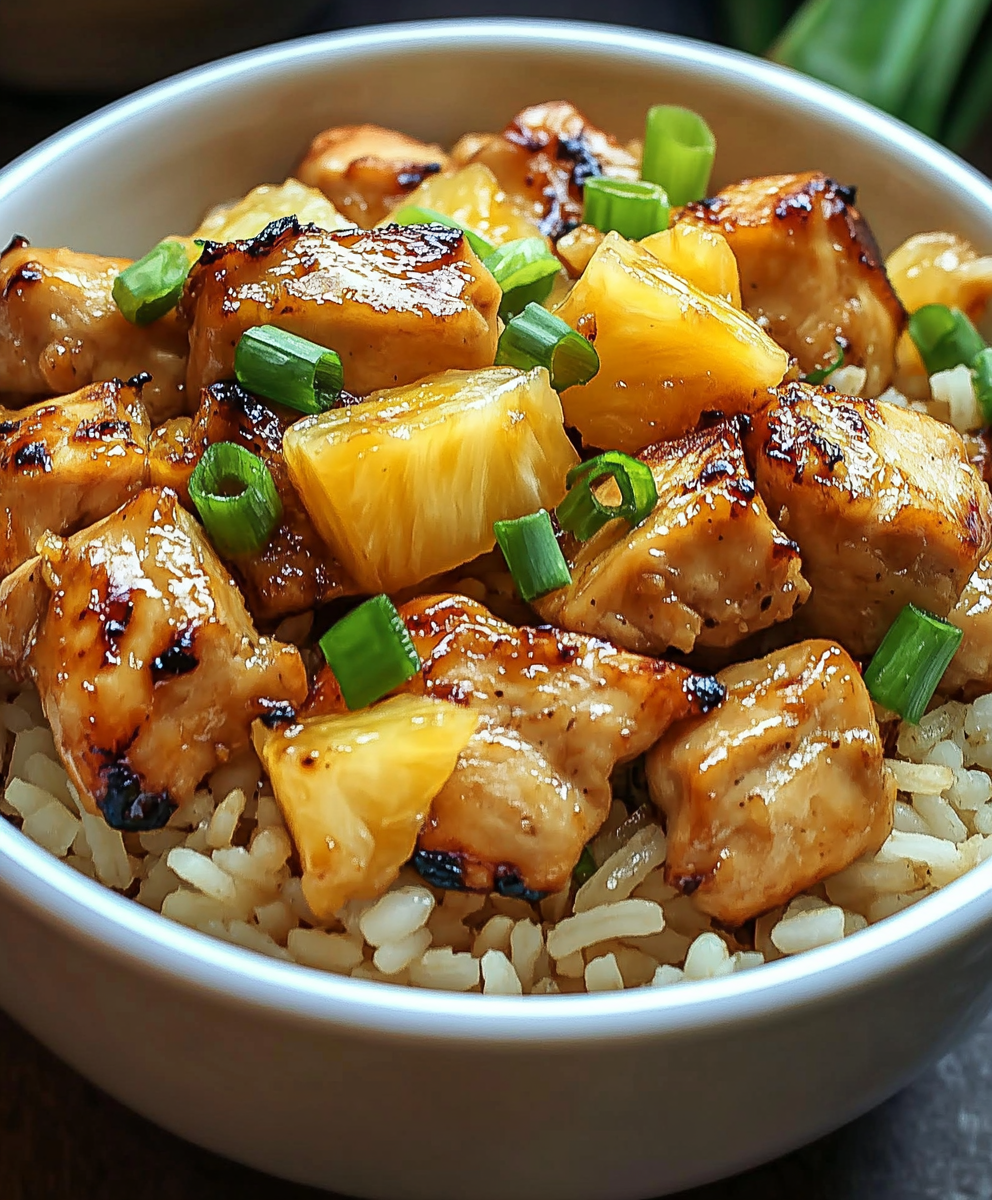
Pineapple Chicken Rice
A bright, one-skillet meal that pairs sweet pineapple with savory chicken and fluffy jasmine rice for an easy, dairy-free weeknight dinner.
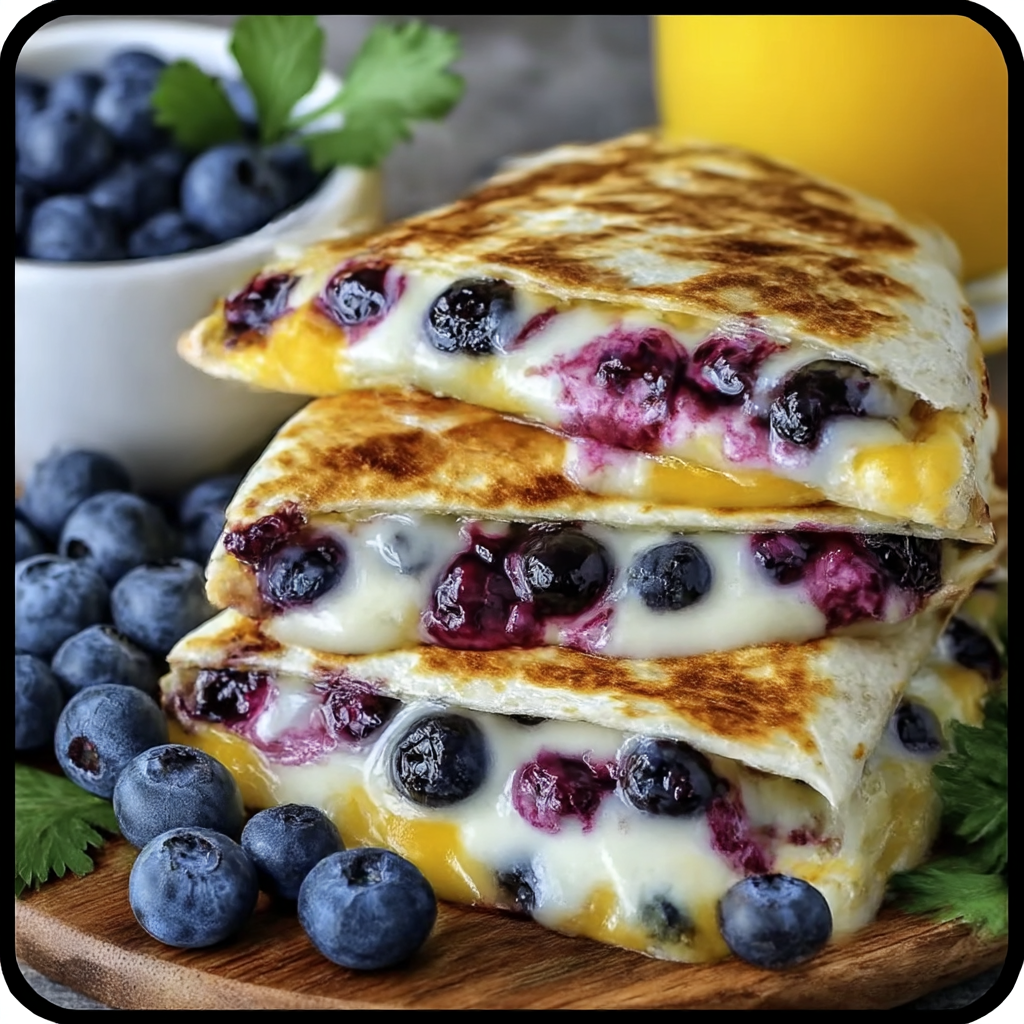
Blueberry Breakfast Quesadilla
Warm tortilla filled with creamy sweetened cream cheese, fresh blueberries and a drizzle of honey—an easy, satisfying morning treat ready in minutes.
Did You Make This?
Leave a comment & rating below or tag @kitchenfunwithmysons on social media!
Rate This Recipe
Share This Recipe
Enjoyed this recipe? Share it with friends and family, and don't forget to leave a review!
Comments (1)
This recipe looks amazing! Can't wait to try it.
Comments are stored locally in your browser. Server comments are displayed alongside your local comments.
Hi, I'm !
What's Popular
Get My 30-Minute Meals email series!
Quick and easy dinner ideas delivered to your inbox.