
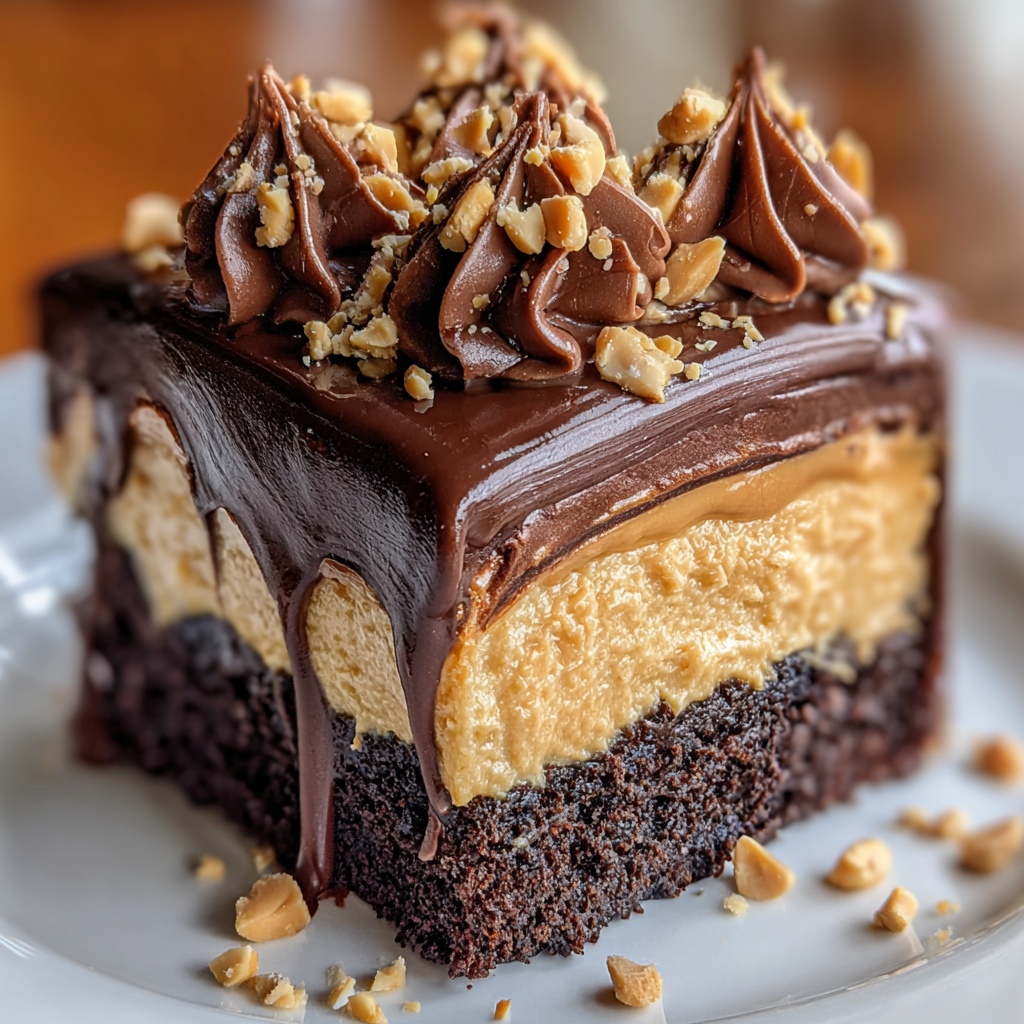
Chocolate Peanut Butter Poke Cake

A moist devil's food cake studded with peanut butter-sweetened condensed milk, finished with a light peanut butter whipped topping, chopped peanut butter cups and a drizzle of fudge—an irresistible crowd-pleasing dessert.
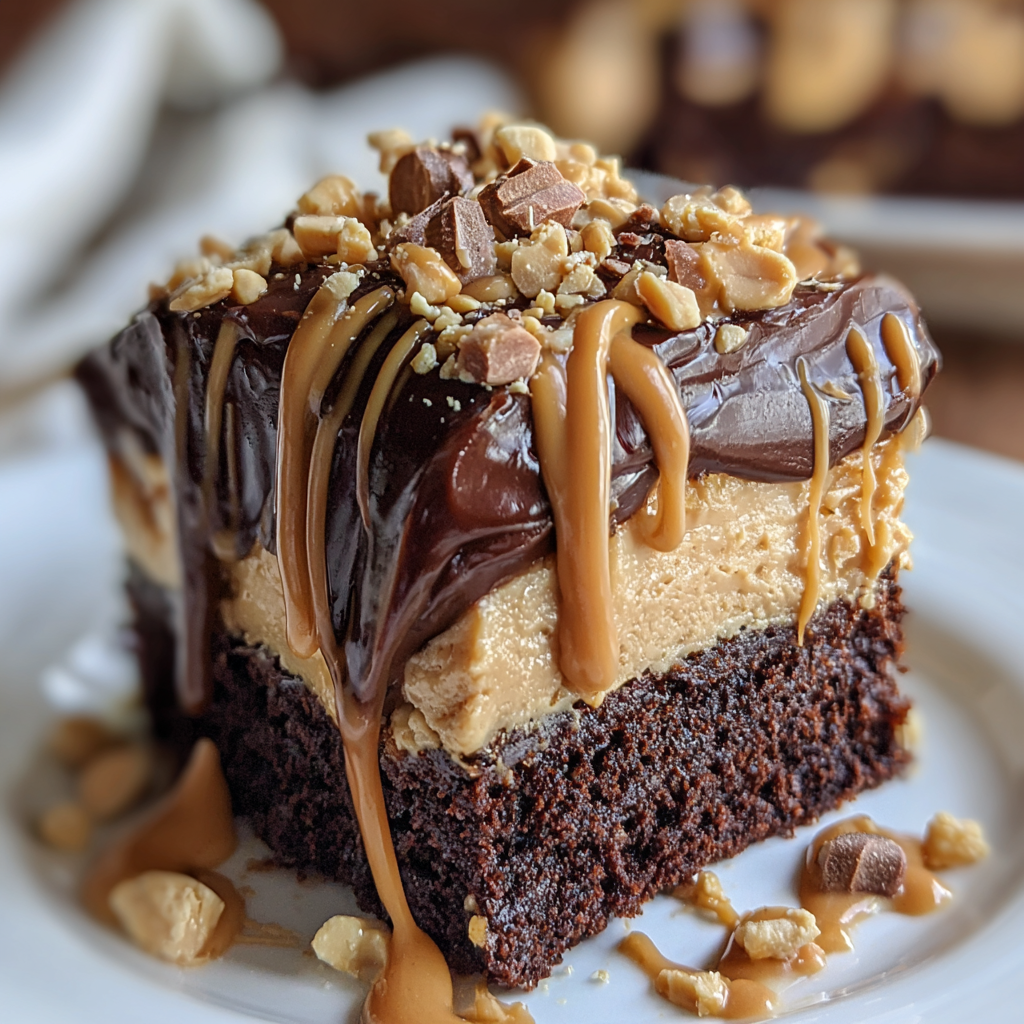
This Chocolate Peanut Butter Poke Cake has been a weekend staple in my kitchen ever since a friend brought one to a summer potluck and I watched it disappear in minutes. I first made it on an evening when I wanted something showy but simple — the kind of dessert that tastes far more elaborate than the effort it requires. The cake itself is deeply chocolatey and tender, while the sweetened condensed milk combined with peanut butter soaks into the holes to create pockets of smooth, creamy filling. A light peanut-butter-spiked whipped topping keeps the finish from feeling too dense, and the chopped peanut butter cups and fudge drizzle on top add texture and a nostalgic candy-shop feel.
I discovered how versatile this method can be: you can use a box mix for speed or my homemade chocolate cake if you prefer from-scratch baking. It’s the kind of recipe that makes people gather — kids rush into the kitchen when they smell warm chocolate, and adults come back for seconds because the combination of salty peanut butter and sweet condensed milk is impossible to resist. The final chilled cake keeps well and actually tastes better the next day after the flavors have melded, making it perfect for celebrations and potlucks.
Why You'll Love This Recipe
- This is a quick-to-assemble dessert: ready to bake in about 20 minutes and on the table after a short cooling period and refrigeration.
- It uses pantry staples — a box mix plus a can of sweetened condensed milk — which makes it ideal for last-minute gatherings or beginner bakers.
- The poke method creates molten peanut-butter pockets that stay moist and distribute flavor evenly throughout the cake.
- Make-ahead friendly: assemble the day before and keep chilled; the texture improves as it rests for a few hours.
- Customizable garnish: swap chopped candy, toasted nuts, or a salted caramel drizzle to change the flavor profile.
I’ve made this for everything from backyard barbecues to birthday parties. My niece declared it her favorite birthday cake ever, and neighbors have requested the recipe after sampling it at a block party. The ease combined with the big payoff is what keeps me returning to this one.
Ingredients
- Boxed devil’s food cake mix (or homemade chocolate cake): Choose a 15.25-ounce box of devil’s food cake mix for reliable deep chocolate flavor. If you prefer from-scratch, use your favorite chocolate cake batter and bake it in a 9×13-inch pan.
- Sweetened condensed milk (1 can): One 14-ounce can provides sweetness and a silky texture that soaks into the holes. This ingredient is key to the poke technique and gives the cake a decadent, custard-like finish.
- Creamy peanut butter (3/4 cup total): Use smooth peanut butter for easy mixing and an even, spreadable filling. Natural peanut butter with runny oil will alter texture; stick with a stable brand like Jif or Skippy for consistent results.
- Whipped topping (8-ounce tub): An 8-ounce tub of frozen whipped topping (thawed) provides a light, airy finish. You can use stabilized whipped cream if you prefer fresh dairy whipped cream, but the tub topping makes assembly simpler and holds up well in the fridge.
- Garnishes: Chopped peanut butter cups, extra peanut butter for drizzling, and fudge or chocolate sauce. I usually use about 1 cup of chopped peanut butter cups and 1/4 cup of ready-to-use fudge topping for an easy, irresistible finish.
Instructions
Prepare the batter and bake: Preheat the oven to the temperature listed on the cake mix box (typically 350°F). Prepare the devil’s food cake batter according to the package directions, or use your favorite chocolate batter. Pour into a greased 9×13-inch baking pan and bake for the time specified on the box, usually 25–35 minutes, until a toothpick inserted into the center comes out with a few moist crumbs. Poke when hot: Remove the cake from the oven and while it’s still hot, use the rounded end of a wooden spoon or a chopstick to poke holes across the surface about 1 inch apart. The holes should be deep enough to reach the bottom or nearly so — this is how the filling will sink in and flavor the cake itself. Make the peanut butter-condensed milk filling: In a small bowl, whisk together one 14-ounce can of sweetened condensed milk and 1/2 cup of creamy peanut butter until smooth. The mixture should be pourable but viscous enough to slowly sink into the holes rather than run off the cake. Soak the cake: Pour the peanut butter–condensed milk mixture slowly over the warm cake, focusing first over the holes and then spreading gently to cover the surface. Allow the liquid a few minutes to settle into the holes — do not press it in. Let the cake cool to room temperature, then transfer to the refrigerator to chill for several hours so the filling sets and the flavors marry. Prepare the topping: Stir the thawed 8-ounce tub of whipped topping with the remaining 1/4 cup of creamy peanut butter until combined and slightly swirled. This creates a light, flavored finish that won’t overpower the cake. Assemble and garnish: Once the cake is fully cooled and chilled, spread the peanut-butter whipped topping evenly over the surface. Sprinkle with chopped peanut butter cups, drizzle warmed fudge sauce and an extra tablespoon or two of melted peanut butter for shine. Return to the refrigerator until ready to serve. Chill before serving: For best texture and flavor, refrigerate the assembled cake for at least 2–4 hours (4 hours is ideal). Slice with a sharp knife wiped between cuts for neat pieces. Serve chilled or at cool room temperature.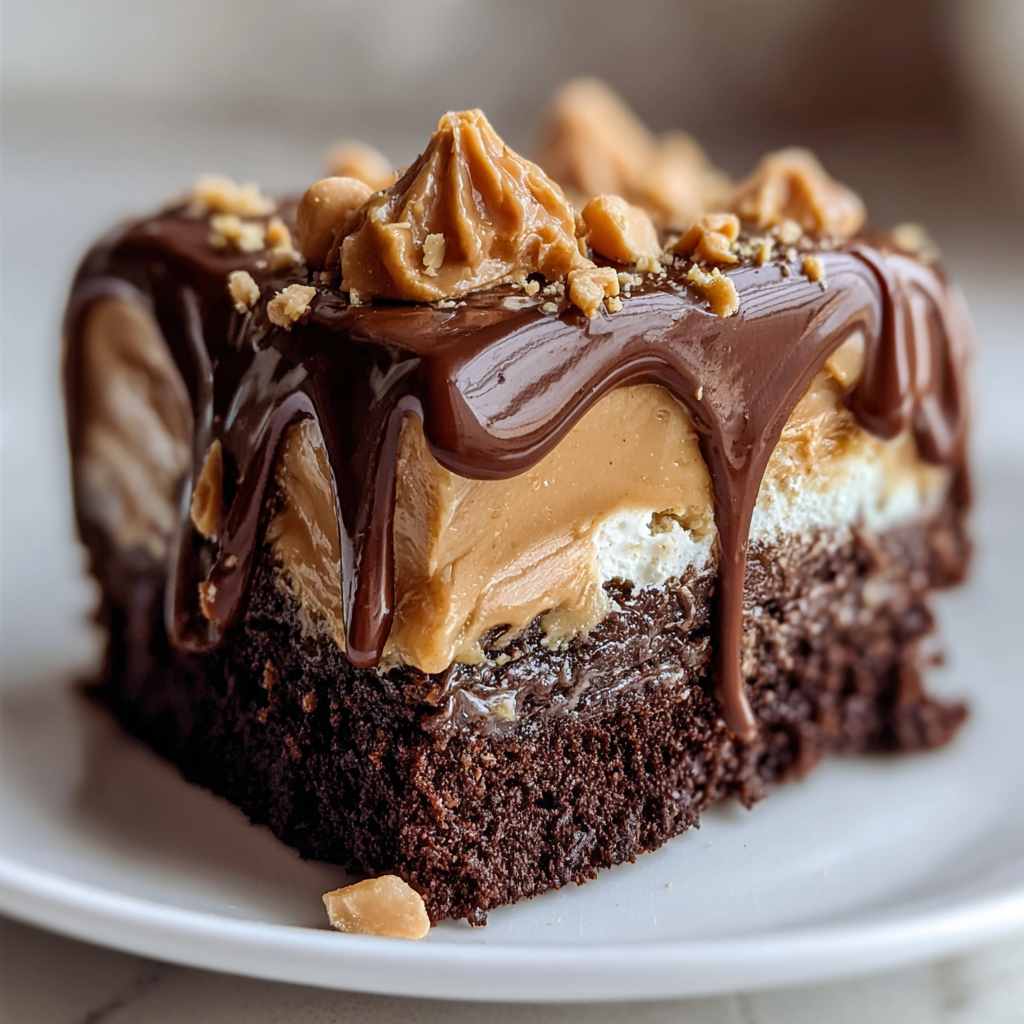
You Must Know
- High in protein and calories compared with plain cakes due to sweetened condensed milk and peanut butter — treat as an occasional indulgence.
- This cake holds well in the refrigerator for up to 4 days in an airtight container and freezes nicely for up to 3 months if sliced and wrapped well.
- Use sturdy containers for freezing to prevent freezer burn; thaw overnight in the refrigerator.
- If you need to transport the cake, chill it until the topping firms and carry in a flat cooler with ice packs to maintain temperature.
I love that this dessert bridges generations: older relatives appreciate the nostalgic candy flavors while kids love the obvious chocolate-and-peanut-butter combination. At family gatherings it reliably disappears first — a true crowd-pleaser that’s simple enough to double when you need to feed a crowd.
Storage Tips
Store leftovers in the refrigerator covered with plastic wrap or in an airtight container for up to 4 days. To freeze, cut into individual slices, wrap each piece tightly in plastic wrap, then place in a freezer-safe container or zip-top bag for up to 3 months. Thaw overnight in the refrigerator before serving and refresh the surface with a small spoonful of melted fudge or a dusting of cocoa powder if the garnish looks dulled after freezing.
Ingredient Substitutions
If you need to avoid store-bought mixes, swap in a 9×13-inch homemade chocolate cake batter using 2 cups flour, 2 cups sugar, 3/4 cup unsweetened cocoa powder, 2 teaspoons baking powder, 1 teaspoon baking soda, 1 teaspoon salt, 2 eggs, 1 cup milk, 1/2 cup vegetable oil and 2 teaspoons vanilla — adjust baking time as needed. For a lighter finish, use homemade stabilized whipped cream instead of whipped topping. To make this dairy-free, use a dairy-free condensed milk alternative and a dairy-free whipped topping, and choose a gluten-free cake mix to keep it gluten-free.
Serving Suggestions
Serve slices chilled with a scoop of vanilla ice cream or a dollop of extra whipped topping. Garnish each plate with additional chopped peanut butter cups and a light sprinkle of flaky sea salt to balance the sweetness. This cake pairs beautifully with coffee, cold milk, or a simple espresso for an adult finish. For a party, present the cake on a platter with small dessert forks so guests can easily sample a slice.
Cultural Background
Poke-style desserts are an American adaptation dating back decades: the technique of making holes in baked goods and filling them with sweetened condensed milk, pudding, or gelatin gained popularity for its dramatic texture contrast and ease. Combining chocolate and peanut butter is a longstanding American favorite inspired by the classic candy pairing, brought into cakes and confections for richer, layered desserts. This version merges that comforting candy flavor with mid-century convenience ingredients like condensed milk and whipped topping.
Seasonal Adaptations
In colder months, swap the chopped peanut butter cups for salted roasted peanuts and warm caramel drizzle for a cozy, autumnal touch. For summer gatherings, top slices with fresh sliced bananas and a tropical rum-flavored fudge for a playful spin. Holiday servings can be dressed up with chopped peppermint candies or orange zest for a festive twist that still highlights the chocolate-and-peanut-butter core.
Meal Prep Tips
Make the cake a day ahead: bake, poke, pour the condensed milk–peanut butter mixture, then chill. Prepare the whipped topping mixture the morning of serving and add the garnish just before guests arrive to keep the candy pieces crisp. Store in a single deep container to avoid cracking the topping; if transporting, place on a flat surface inside a cooler to maintain structure.
This cake is a celebration of simple techniques delivering maximum flavor. Whether you take the shortcut of a box mix or bake from scratch, the poke method and the peanut butter-condensed milk filling transform an everyday cake into something unforgettable. Give it a try for your next gathering — I promise it will be one of the first dishes to vanish.
Pro Tips
Allow the cake to cool slightly before poking holes to avoid collapsing the crumb — warm is perfect but not piping hot.
Pour the peanut butter-condensed milk mixture slowly so it seeps into the holes without pooling on top.
Chill the cake for at least 4 hours for best texture; overnight is ideal for maximum flavor melding.
Use a sharp, clean knife wiped between cuts for neat slices of chilled cake.
This nourishing chocolate peanut butter poke cake recipe is sure to be a staple in your kitchen. Enjoy every moist, high protein slice — it is perfect for breakfast or as a wholesome snack any time.
Tags
Chocolate Peanut Butter Poke Cake
This Chocolate Peanut Butter Poke Cake recipe makes perfectly juicy, tender, and flavorful steak every time! Serve with potatoes and a side salad for an unforgettable dinner in under 30 minutes.
Instructions
Prepare batter and bake
Preheat oven to the temperature on the cake mix box (usually 350°F). Prepare batter according to package directions or use a homemade chocolate batter. Pour into a greased 9×13-inch pan and bake until a toothpick comes out with a few moist crumbs, about 25–35 minutes.
Poke holes while hot
Remove the cake from the oven and while still hot, poke holes all over the surface about 1 inch apart using the rounded end of a wooden spoon or chopstick. Holes should be deep but not destroy the structure.
Make filling
Whisk together the 14-ounce can of sweetened condensed milk and 1/2 cup creamy peanut butter until smooth and pourable. Adjust slightly if too thick with a teaspoon of milk.
Pour filling over cake
Slowly pour the peanut butter-condensed milk mixture over the warm cake, focusing on the holes first so the liquid seeps in. Let the cake cool to room temperature to allow the filling to settle.
Chill to set
Transfer the cake to the refrigerator and chill for at least 2–4 hours; overnight is best. Chilling helps the filling set and the flavors meld.
Prepare topping and garnish
Stir the thawed whipped topping with the remaining 1/4 cup peanut butter until combined. Spread over the chilled cake and garnish with chopped peanut butter cups, a drizzle of fudge sauce, and extra peanut butter if desired.
Serve chilled
Slice with a sharp knife, wiping between cuts, and serve chilled. Store leftovers covered in the refrigerator for up to 4 days.
Last Step: Please leave a rating and comment letting us know how you liked this recipe! This helps our business to thrive and continue providing free, high-quality recipes for you.
Nutrition
Did You Make This?
Leave a comment & rating below or tag
@kitchenfunwithmy3sons on social media!
Categories:
You might also like...
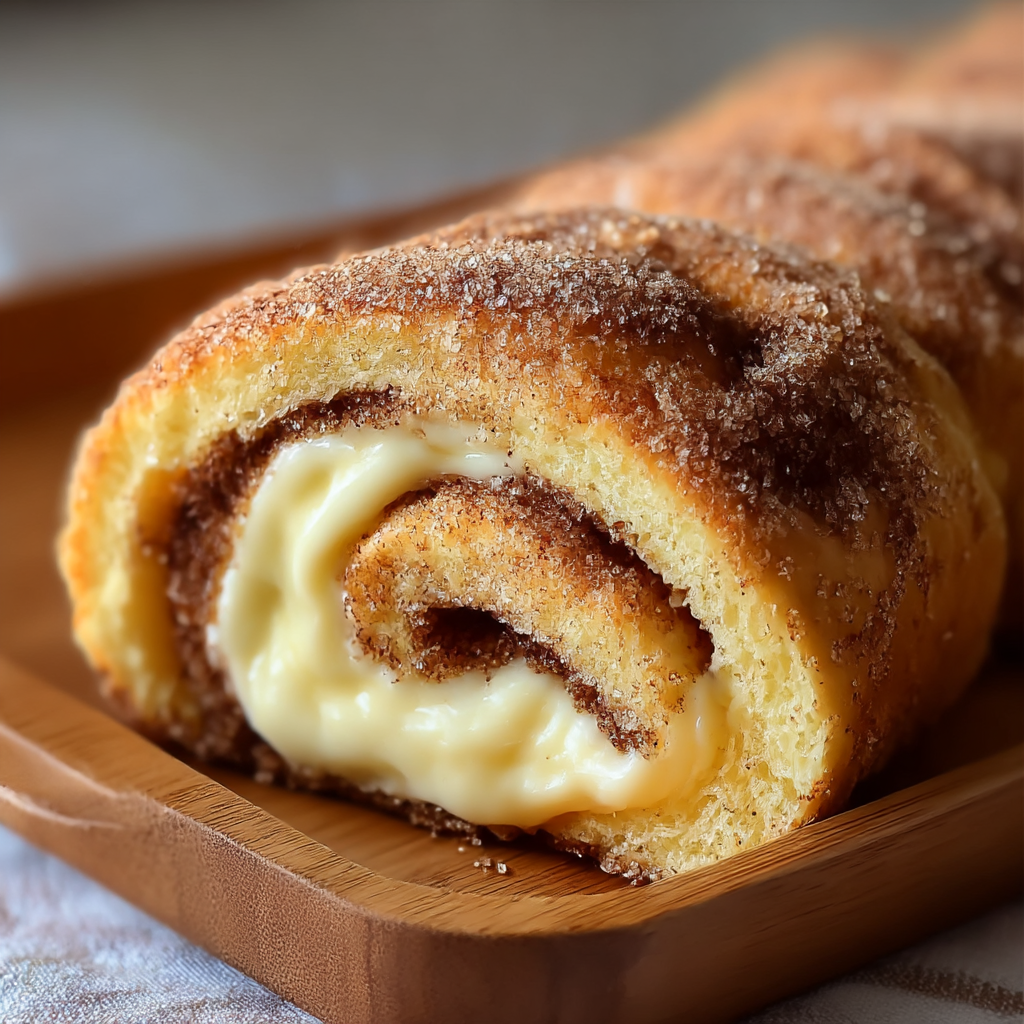
Cinnamon Sugar Cream Cheese Rolls
Buttery pastry envelopes a sweet, creamy cinnamon filling for an irresistible warm dessert or snack—ready in just 30 minutes.

Pineapple Chicken Rice
A bright, one-skillet meal that pairs sweet pineapple with savory chicken and fluffy jasmine rice for an easy, dairy-free weeknight dinner.

Blueberry Breakfast Quesadilla
Warm tortilla filled with creamy sweetened cream cheese, fresh blueberries and a drizzle of honey—an easy, satisfying morning treat ready in minutes.
Did You Make This?
Leave a comment & rating below or tag @kitchenfunwithmysons on social media!
Rate This Recipe
Share This Recipe
Enjoyed this recipe? Share it with friends and family, and don't forget to leave a review!
Comments (1)
This recipe looks amazing! Can't wait to try it.
Comments are stored locally in your browser. Server comments are displayed alongside your local comments.
Hi, I'm !
What's Popular

Get My 30-Minute Meals email series!
Quick and easy dinner ideas delivered to your inbox.